How to measure and hang curtain drapery panels, everything you need to know!
Posted by Superior Custom Linens on Jul 30th 2018
Curtains are essential to creating a well-styled home, getting them done the right way will make the space look big, bright and open.
Here we are showing the right way to measure the drapery panel size, how to hang them the right way that best accentuates your home and gives the illusion of more space.
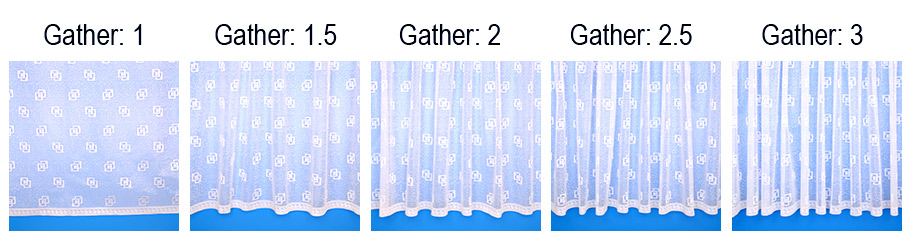
Step One: Determine the fullness.
The fullness is how much gathering you want your drapery look when they are closed.
Below is an illustration shows you the gathering from 1X to 3X. If you are still not sure which one to choose, choose 2X won't go wrong.
Step Two: Determining the drapery panel width.
>> If you have the rod installed already, measure your rod length not including the end cap. Multiple the length by the fullness your choose. Say if your rod is 80" long and you choose 2X fullness, your window panel width should be 160" wide if you want single panel or two panels, each is 80" wide.
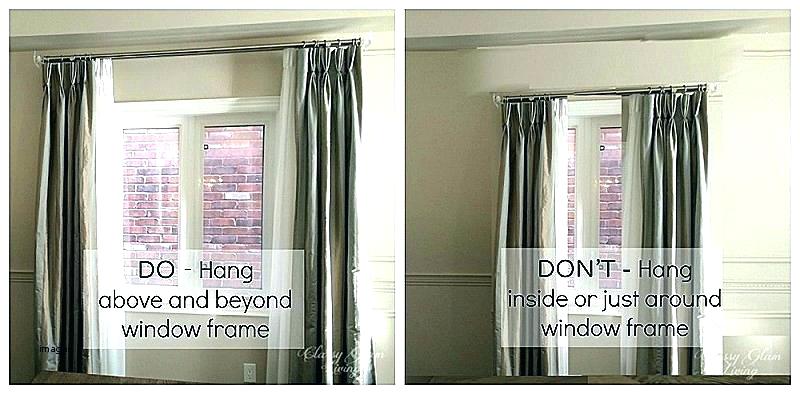
>> If you don't have the rod installed, it's recommended to extend the rod 6-8" beyond each side of the window frame,that's the area where the panels will sit when they are open, give your window the illusion that they are much wider and let as much ligh in as possbile. So the window width from trim to trim plus 6-8", that's how long the rod should be. Multiple the rod length by the fullness you choose. If your window width from trim to trim is 50", ideally the rod length would be 65" long and you choose 2X fullness, your window panel width should be 130" wide if you want single panel or two panels, each is 65" wide.
Step Three: Determining the drapery panel length.
>> If you have the rod installed, measure from from bottom tip of the rod to the floor. Deduct 1” if you want your drapery to break on the floor. Or add 1-2” for light puddle.
>> If you don't have the rod installed, mount the rod 6-8" above the window top trim to give your window the illusion of taller ceiling, Measure from the window top trim to the floor (B), add 6-8” , that’s where the rod should be placed, deduct 1” if you want your drapery to break on the floor. Or add 1-2” for light puddle.
Here you can see how the rod installation can really makes a differences to make the space looks wider and taller.
Step Four: Lined or unlined.
Now you have the panel width and length measured. The next thing is to determine if you want the draperies lined.
If you want to keep the natural look of the drapery, you can leave them unlined.
If you choose the light color drapery and want extra shield of privacy, you can choose white privacy liner. The liner also help protect the drapery from direct sun light therefore prolong the drapery fabric lifespan. If you choose expensive drapery such as Belgian linen, privacy liner is recommended.
Blackout liner is also an option. Keep in mind, the blackout liner is made of synthetic material, it can add substantial weight to the drapery itself. If your drapery is already wide and long, it's recommended to have the blackout liner made separately and installed on double rod / track.
Step Five: Hanging Style
Here are a few most common drapery hanging styles.
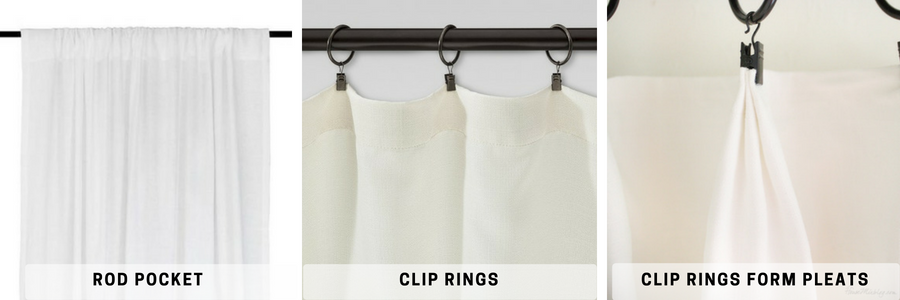
Rod Pocket, it's also called pole pocket. These curtains have a generous 3" pocket along the top that easily slips over a curtain rod. The draw back is you have to manually adjust the drapes to form even folds. This can be improved by using clip rings instead. By spacing out the clips evenly through out the panel, it forms nice even gathered folds when the draperies are closed. By using clip rings, you can also form different pleats at the top, so clip rings can be used different ways.
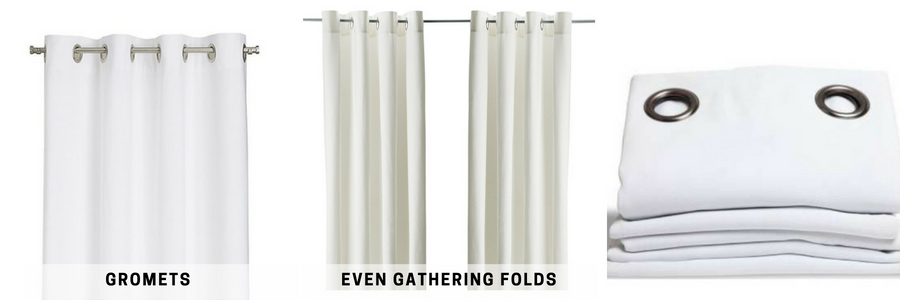
Grommet top offers modern look that glide curtains on the rod with ease, it also forms the gathering folds evenly.
Pinch Pleats curtains have the pleats sewn into the top. They can be used on either a track system or on a rod with rings. Pinch pleats comes in fixed 2X of 3X fixed folds.
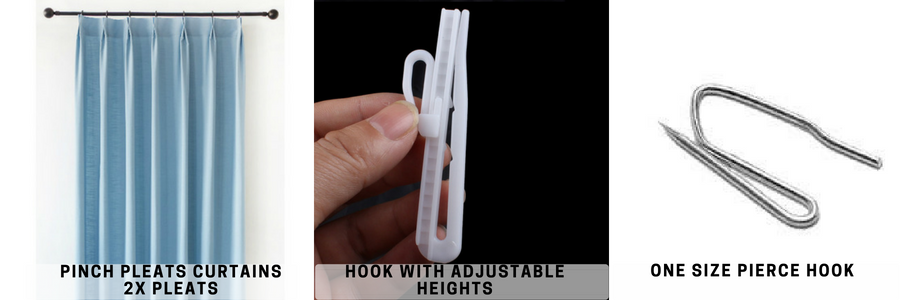
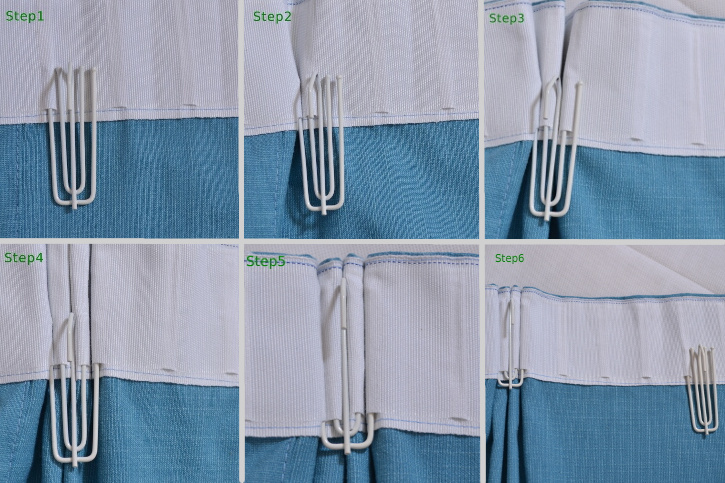
Versatile Pleats curtain tape, combined with the 4 prongs hooks, can form at least 5 major headings.

When you choose the pleated hanging style, another tip to take your drapery installation to a professional level is to hang your curtain like a pro is have the curtain return to the wall. Curtain return is the distance of the curtain rod to the wall. By installing the the hook and eye on the wall behind the last pleat hook will not only give you a more professional look, but the side of your curtains will now block out light!
To create a "photo-ready" look, consider iron curtains prior to hanging them to remove the bulk of the creases.
At SCL, we offer curtain linen swatches so you can see the color, feel the fabric before spending $$$ on the draperies.